Showing posts with label crafts. Show all posts

Sunday, July 8, 2012

Story of the World: Chapters 5 & 6

Life has been a little crazy around here this week between the 4th of July and preparing for the kids' art class I'm teaching next week.  So here's a combined post for The Story of the World and Episcopal Children's Curriculum (EEC).  Chapter 6 of SOTW tells the story of Joseph, which tied into our EEC unit, so we studied them together.

Story of the World: Chapter 5
This chapter tells the story of Sargon, the first Sumerian dictator.  Sargon united Sumer and renamed it Akkadia.  Chapter 5 was very short and none of the suggested crafts particularly appealed to us, so we skipped them.

Books
The Golden Sandal - a Cinderella story set in Mesopotamia


Videos
Ancient Civilizations for Children: Ancient Mesopotamia (With Teacher's Guide) [VHS]

Activities
Sumerian Inventions Word Search - found in the Activity Guide


Story of the World Chapter 6 and EEC Shell Year Unit 1: Sections 5 & 6

Books
Joseph - this is a BEAUTIFULLY illustrated bible story
Dance, Sing, Remember : A Celebration of Jewish Holidays - introduces Jewish holidays and includes some accompanying activities


Videos
Joseph - King of Dreams


Craft
Crazy Bug made a many colored dream t-shirt using spray on fabric paint. This was a good lesson in "less is more" because the more spray that was added the muddier the colors became.  We're going to try it again this summer using only closely related colors like red, purple, and blue.


We've also been checking our Chicken Mummy and changing his salt mixture regularly.  He's already dried out a lot!

Saturday, June 23, 2012

Story of the World: Chapter 3

Chapter 3 of the Story of the World is only one section long, but we did a lot with it!  This chapter discusses the invention of writing and introduces both cuneiform and hieroglyphics.  We read the chapter and completed the chapter 3 lapbook component.

Books
Seeker of Knowledge - I loved this book!  It's a great beginner's biography of the man who deciphered the Rosetta Stone.

Craft
After discussing how the Egyptians made papyrus, we made our own homemade paper.  I've done this before using materials from around the house and it was a pain in the neck.  This time we used Arnold Grummer's Papermaking Kit , and it was much, much easier!

Science
We did an experiment to test which was a more durable method of writing, carving on clay tablets or writing on paper.

1.  First, we used Sculpey oven-bake clay ( III Modeling Compound copper) to create clay "tablets".  Using toothpicks, we carved cuneiform letters onto them and baked them until hard.


2.  My mother gave Crazy Bug a great hieroglyphic stamp set from the Metropolitan Museum of Art, which we used to stamp "papyrus" (resume paper).  We rolled the paper into scrolls and tied them with string.


3.  We filled two identical containers with the same amount of same temperature water (a great time to talk about controlled variables), and put the clay tablet in one and the paper in the other.  We then checked the items every few hours to see how they were holding up.  By the next morning, we couldn't unroll the paper without ripping it, but the clay was unchanged.  Crazy Bug and I discussed the fact that there are few records from the later Egyptian periods and how this relates to the use of paper.  We also discussed how our modern records (paper and computer files) might hold up in 5000 years.

Monday, June 18, 2012

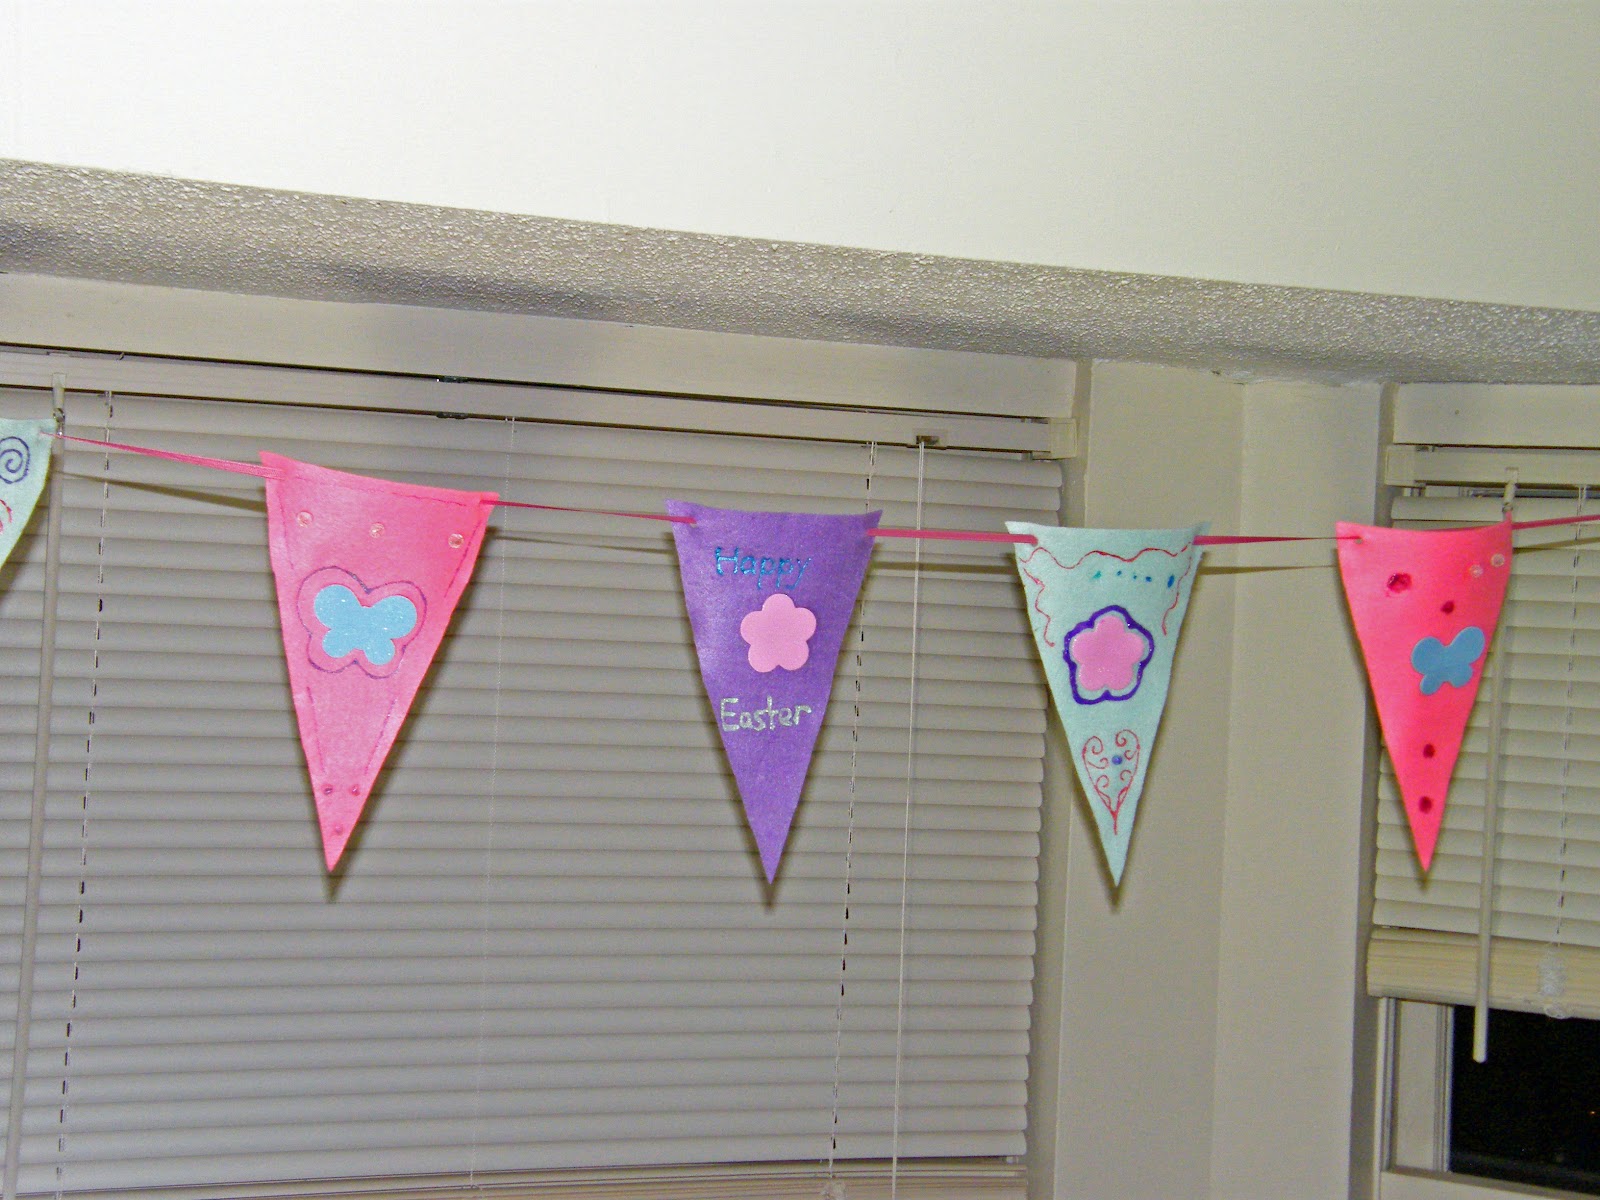
Cute Banner Craft

Make this cute, simple banner to decorate a kid's bedroom, decorate for a party, or just liven up your house!  It works nicely as either a family project or something for your kids to work on at the table while you're making dinner.


Materials needed:

Three 9"x12" sheets of colored felt
Foam or felt stickers
Glitter glue or puffy paint
Beads
Strong glue (Like Beacons 3-in-1)
Hole punch
1/4" satin ribbon

Directions:

1.  Cut 9 triangles from the felt. They should be approximately 3" wide at the base and 10" long.

2.  Decorate the triangles with the stickers, glitter glue, and/or puffy paint.  Glue the beads on for added detail.

3.  Punch two holes at the top corners of each triangle.

4.  String the triangles on the ribbon in a pleasing pattern and then hang.

Wednesday, June 6, 2012

Story of the World: Chapter 1

This weekend we read The Story of the World, Chapter 1: The Earliest People.  It told us about the nomads and how some of them came to settle in the Fertile Crescent.  Crazy Bug particularly liked the parts about the girl, Tarak, bringing home lizards for her mother to make into stew.

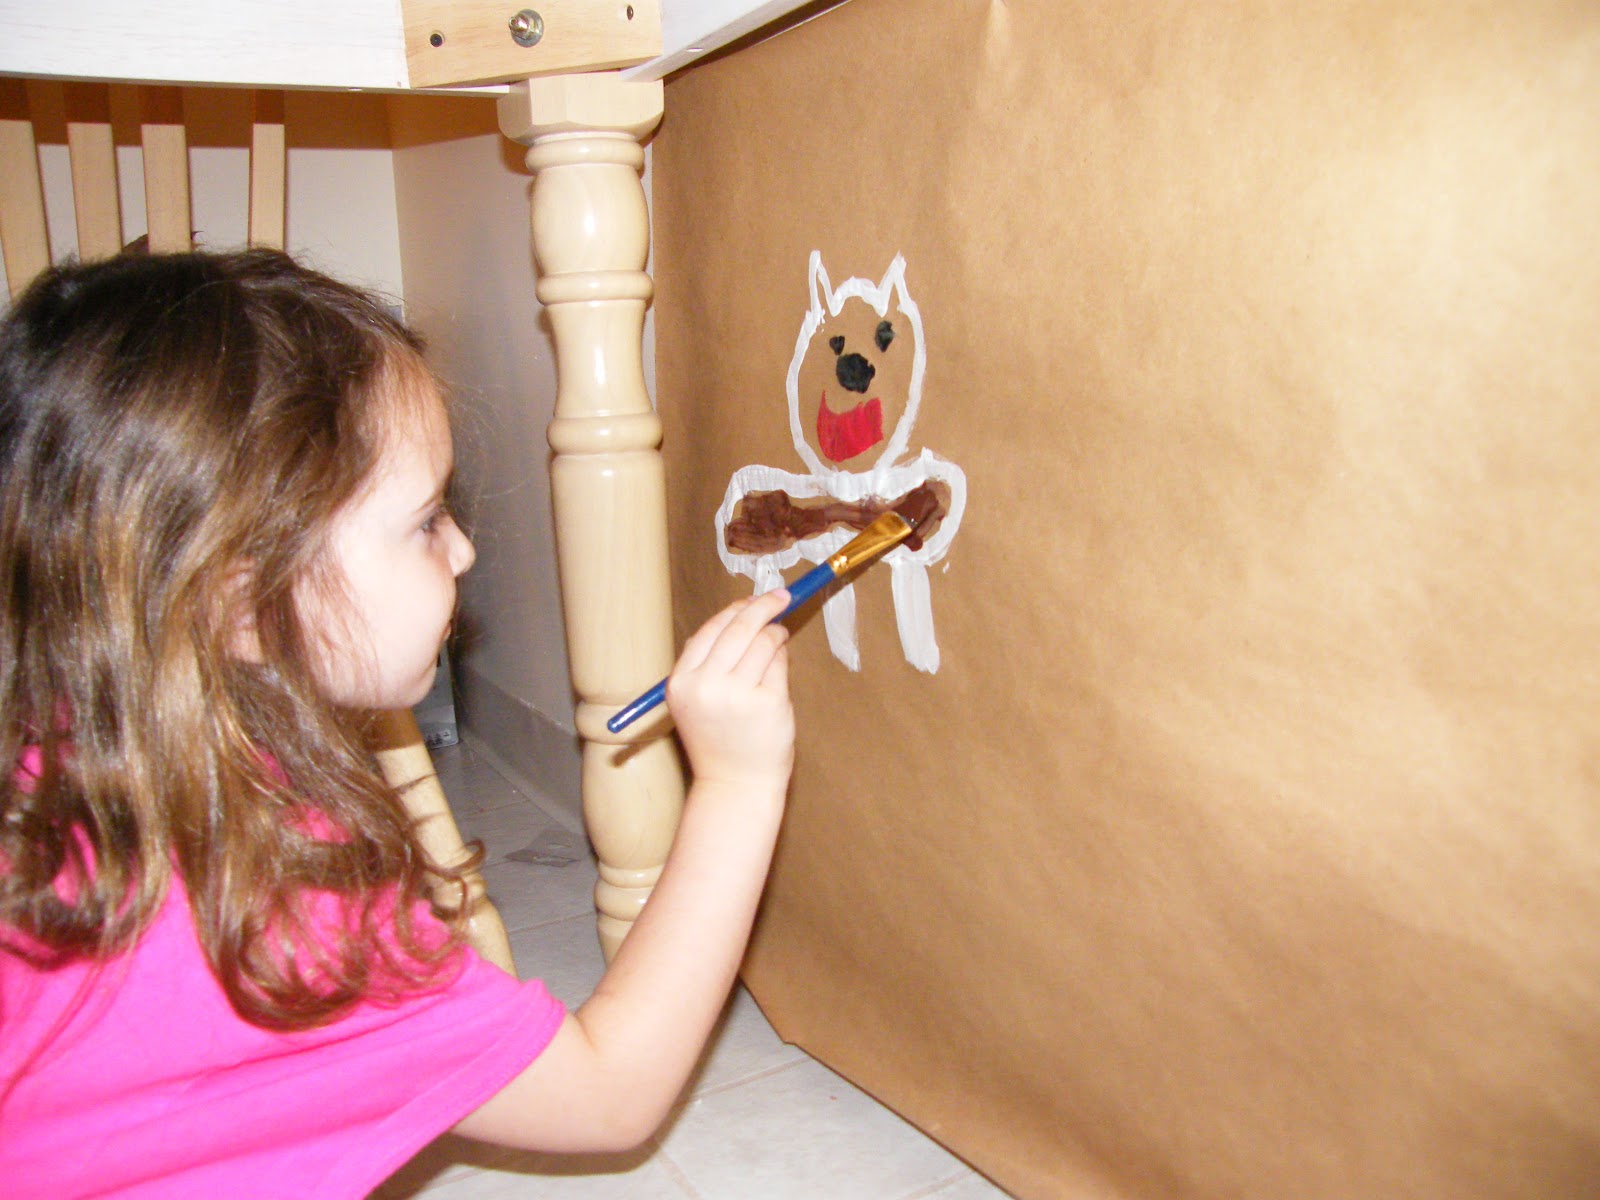
Our project was to make cave paintings like the ones the nomads made.  Our "cave" was underneath the kitchen table.  I taped brown packaging paper to the walls and pulled out some black, brown, red, and white paint.  We painted animals and animal hunts.  This led into a long session of imaginative play, where Crazy Bug hunted,gathered, and built a Lincoln Log fire so we could cook our lizard stew.


Our extra reading choices this week were The Cave Painter of Lascaux and Digging Up History (Usborne Beginners) .  The first book was not a hit, but the second one was.  After our pretend archaeology dig last week, Crazy Bug marveled at how archaeologists dug out entire cities.  The Usborne Beginners books also have internet links for more information, so we played an archaeology game online.  Crazy Bug had to act like a real archaeologist and try to determine what various artifacts were used for.  She discovered that it's harder than one might think!

Wednesday, May 23, 2012

Chihuly Artist Study


Dale Chihuly is a glass artist who makes beautiful, colorful, gigantic glass pieces that fascinate kids.  He's also an exciting artist to study because he's still alive and creating.  And he looks like a pirate.  I'd never even heard of him until Crazy Bug and I went to the MFA.  In the middle of the museum there is a 40 ft glass sculpture entitled Lime Green Icicle Tower.  It's incredible to look at up close.  It glows in the the light on a sunny day.                                                                                                             Since Chihuly is a recent artist, we couldn't find a children's biography about him.  But the Indianapolis Children's Museum came to the rescue with their Chihuly unit for teachers.  It includes a two page biography that worked perfectly for us.  There are also online games and videos that allow children to explore glass work.


Our first project was to make "glass" bowls that explore color mixing.

Materials:
Coffee filters
Washable markers
Water mister
Spray starch (try your local dollar store for a can)
Glasses, bowls, or tupperware
Newspaper

The process is pretty simple.

1.  Have your child decorate a coffee filter with markers.  Try different color combinations and patterns.  Feels free to swirl the colors all around each other.

2.  Mist the coffee filter lightly with water to help the colors start mixing.

3.  Lay down some newspaper and place upside-down glasses, bowls, or tupperware on top.

4.  Put each coffee filter over a bowl or glass and spray it with starch.  Use your finders to fold and mold the coffee filters into interesting shapes.


Crazy Bug loved this project so much that she made dozens of bowls.  They lay around our house until my mother suggest using them to make a flower garden on Crazy Bug's bedroom door.  I trimmed some green paper into a grass border and taped it to the bottom of the door, then added thick green ribbon stems.  We then tapped the bowls to the top of the stems to make flowers.  Too cute!

The second project was to make a free form "glass'' installation.  I picked up cheap clear plastic cups and stemmed glasses at the Dollar Tree and we colored them with permanent markers.  (Medium to light colored markers look best.  We painted the inside a few of the ones shown here with acrylic paint, but those turned out too dark and matte for my taste.)  I then placed them on a foil covered cookie sheet and broiled them for a couple of minutes until they started to melt.  Watch carefully and open all your windows!  Afterwards, I hot glued them together and hung them with strong thread.  This looks beautiful hung in front of a window where it will catch the light!


If you like near Indianapolis, go check out Fireworks of Glass!  We'll be soooo jealous!


*I selected this post to be featured on Education Blogs. Please visit the site and vote for my blog!*

Monday, May 14, 2012

Jacob's Dream

Here is our project for lessons 3 & 4 of ECC:


I combined lessons 3 and 4 for two really sound pedagogical reasons: I thought 3 was boring and I couldn't find a good craft to go with it!  I searched and searched for a good craft for lesson 4 and finally came across this printable from New Church Vineyard.

Crazy Bug colored Jacob and the ladder, cut them out, and glued them to blue construction paper.  Then I helped her do a Google image search for angels.  She adores printing things off the computer, which I rarely let her due because colored ink costs so much.  I copied and pasted the images onto a Word doc, then adjusted their sizes so they all fit on about 1/2 a page.  We printed them out and Crazy Bug cut them out and glued them around the ladder.  Finally, for a heavenly touch, we added extra fine, clear glitter to the angels, ladder, and air.  (I love extra fine, clear plastic glitter!  It matches any project, looks more classy then regular glitter, and doesn't seem to leave the same kind of mess all over your house!)

Next up in EEC: Joseph and his coat of many colors.  Stop by next week to check it out!

Wednesday, May 9, 2012

Noah, His Ark, and Father Abraham

Here are our bible crafts for lessons 1& 2 of ECC!

Noah's Ark


This project was actually suggested in the curriculum.  The rainbow is a sign of God's promise to humanity, so we made a big rainbow collage.

1.  Take a piece of poster board and sketch a large rainbow on it.  (I was neurotic and actually used a ruler so all the colors would be the same width.  But feel free to freehand it!)

2.  Collect all the craft or could-be-craft supplies in your house and start sorting by color.  We used feathers, foam shapes, pom-poms, dyed pasta, fabric flower petals, etc.  Start gluing them on to the appropriate rows.  (By the way, if you don't have a good, strong, fast drying glue, I'd highly recommend Beacons 3-in-1 Craft Glue.  It's a liquid glue that dries as strong as hot glue!  Keep an eye on it though - it took the finish off my coffee table!)

3.  If you've run out of materials and it still looks wimpy, add stickers to any empty spots.  AC Moore usually has great tablets of 500-1000 stickers for $1 each.

4.  You can just print "Promise" above it or print the quote "I have set my bow in the clouds and it shall be a sign of the covenant between me and the earth." (Genesis 9:13)


Abraham and Sarah


God promised to make Abraham's descendants as many as the stars in the sky.  So we made beautiful "stained glass" stars.

1.  Cut a star out of cardstock, poster board, or a cereal box.

2.  Use a hot glue gun to make thick lines of glue across the star in various directions.  These will be "metal" between the colors of glass.

3.  Glue aluminum foil to the star with white glue or a glue stick.  Fold the edges around the back of the star.

4.  Use Sharpies to color the areas between the glue ridges.  (Fat, marker-like Sharpies work much better than ultra-fine point ones.)